
Supporting Trees and Plant Guarantee
Please Scroll down to view our Guarantee terms and the guide to follow!
Planting Guide
To give your tree the best possible start, we’ve created a simple step-by-step planting guide with clear photos. As long as these steps were followed and provided photos immediately after planting, your tree will be covered by our planting guarantee. If the tree fails to establish due to a planting-related issue, and you can provide the photo evidence when making a claim, we’ll offer a replacement or credit—no fuss. It might be a little pedantic but we are only willing to make a loss if you are willing to put 100% effort it. This way, you can plant with confidence knowing you’re supported from day one.
WE REQUIRE THESE AS SOON AS YOU HAVE PLANTED SO WE CAN ADVISE IF ANYTHING NEEDS CHANGING. PLEASE CONTACT US IF YOU INTEND TO KEEP IN A POT, WE WILL ADVISE IF SUITALE AND AND BEST CARE
THESE ARE ALL PRECATUIONS WE TAKE BEFORE PLANTING, NO EXCEPTIONS! THIS IS THE ONLY WAY WE ARE GUARANTEED BY OUR SUPPLIERS.
PLEASE SEND THE PHOTOS TO PHOTO@HCTREES.UK IMMEDIATELY
Step 1
Drainage test - THIS IS WHY MOST FAILED PLANTS, FAIL!
Before planting, we need to see you have considered drainage.
We can not really ask for proof of this as anyone can just dig a hole so no photos required.
YOU WILL THANK YOURSELF FOR GOING THE EXTRA MILE!! NEW BUILDS ARE GUARANTEED TO BE BAD
Step 2 -
Dig a Proper Hole
Dig a hole that’s twice as wide as the pot and about the same depth. Loosen the soil at the bottom and sides with a garden fork – this helps roots grow outwards easily.
If your soil is heavy clay or very sandy:
- Mix the dug-out soil with well-rotted compost to improve structure.
- blood, fish & bone fertiliser to give the plant a nutrient boost.
Step 3
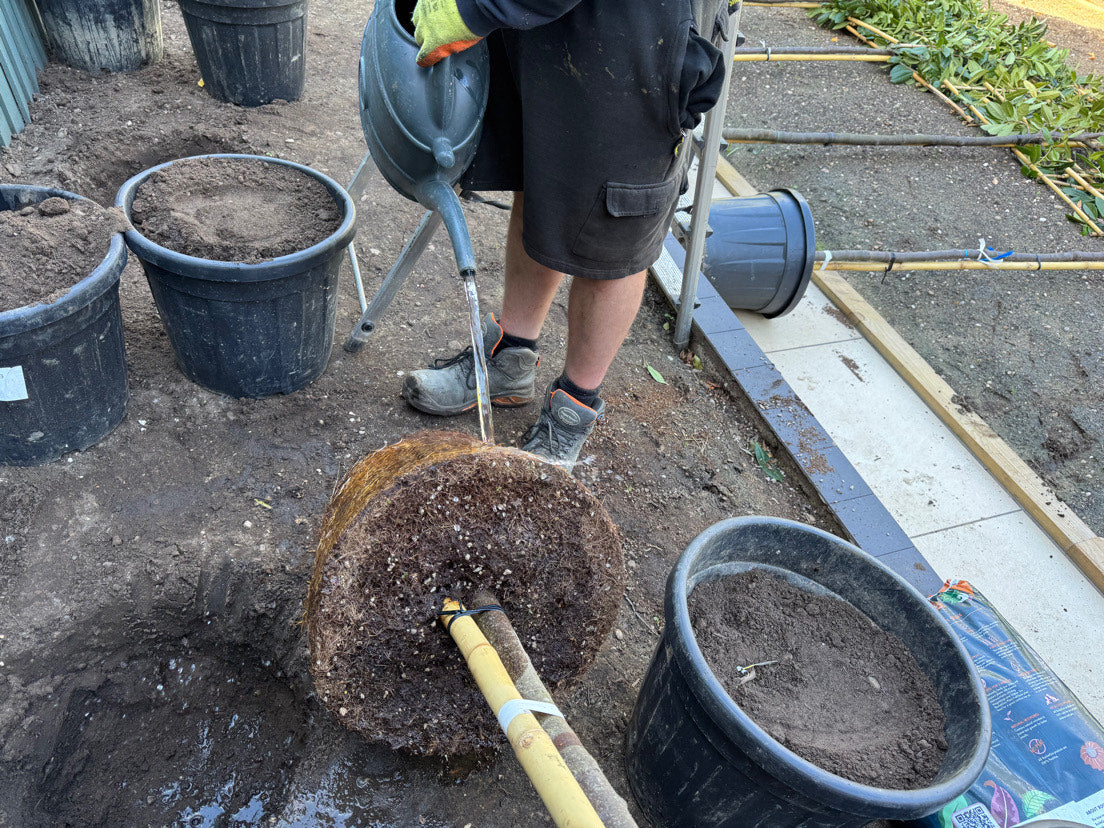
Prepare the Plant (PHOTO REQUIRED)
Take the plant out of its pot gently. Check the roots:
If they’re tightly circling around the root ball, tease them apart with your fingers or a hand fork.
This encourages them to grow outward into the soil instead of staying bunched up.
SPECIFIC THINGS I WANT TO SEE
- COMPOST USED
- TOPSOIL USED
- FUNGI ROOT GROW FOR EXTRA POINTS

Step 4
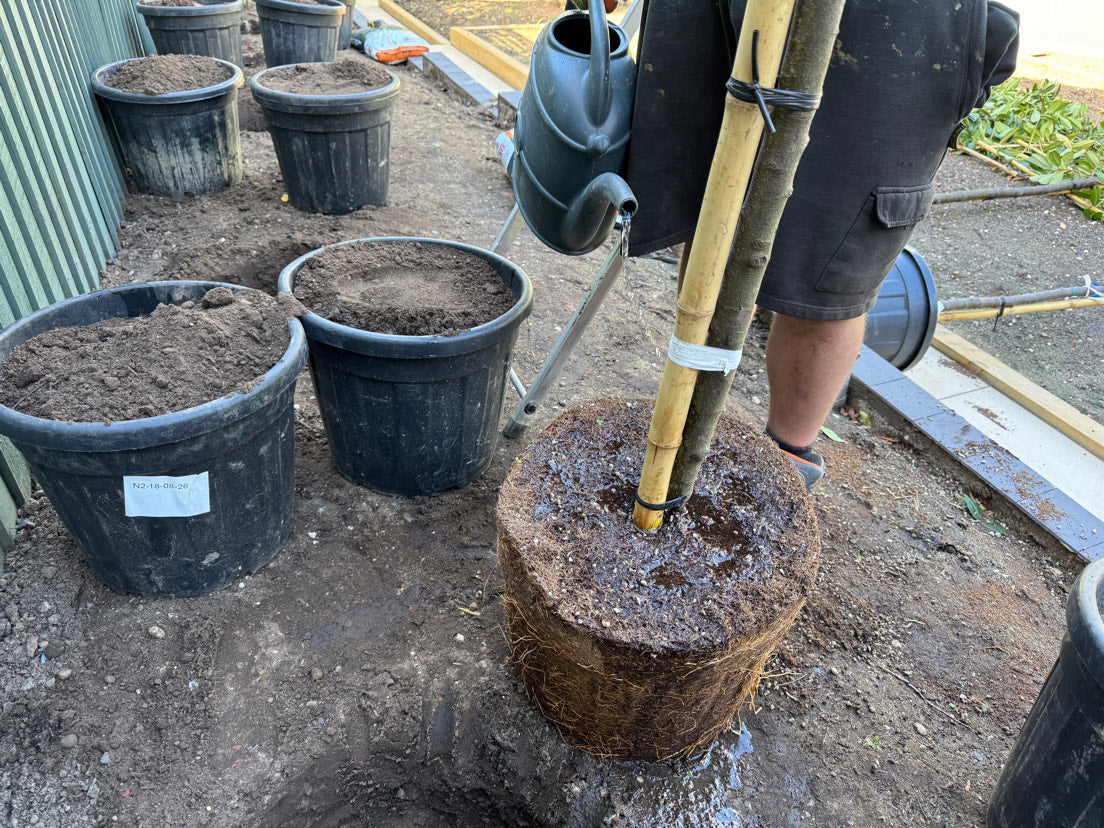
Place in the hole (Photo required for guarantee)
Put the plant in the hole so that the top of the root ball is level with the soil surface — not deeper. The base of the stem should be just above ground level, with the first roots (root flare) slightly covered.
SPECIFIC THINGS I WANT TO SEE
- top of root ball sits at surface level
Step 5
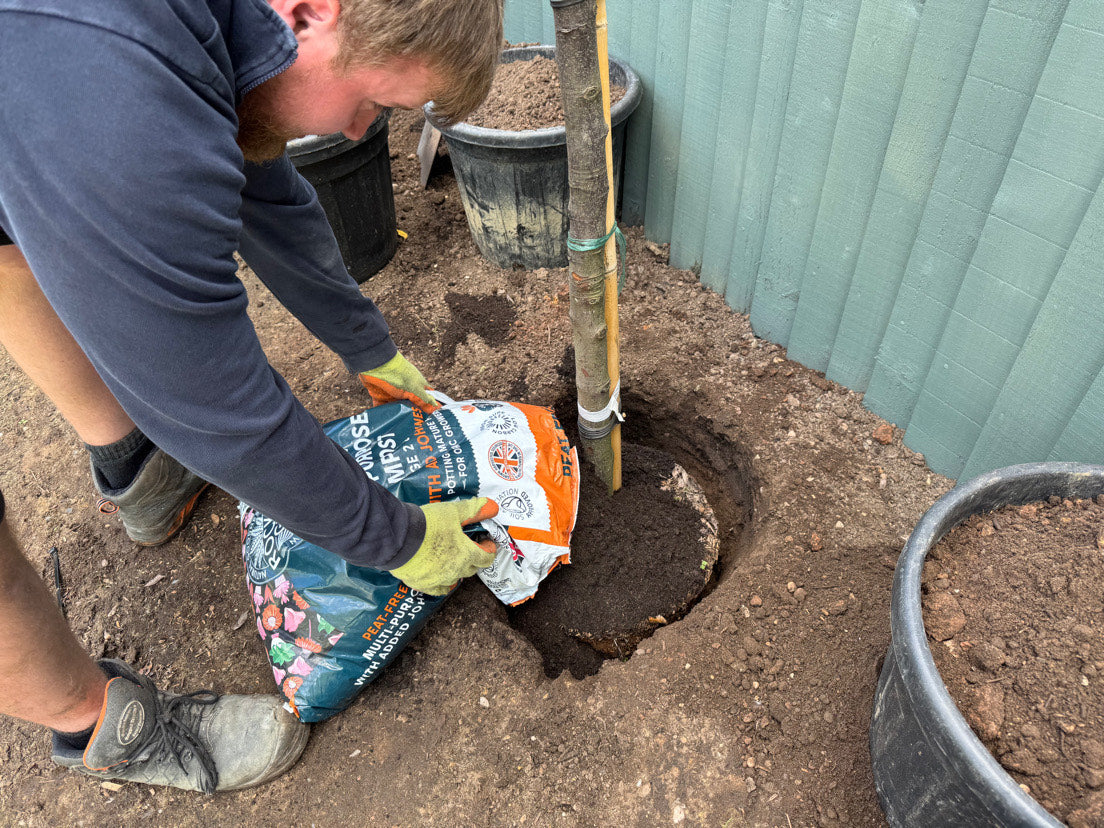
Backfill and firm in (Photo required for guarantee)
Refill the hole with the original soil (and compost mix, if used), packing gently around the roots in layers. Firm it down with your hands or foot HARD — but don’t press directly on the root ball. MAKE SURE YOU HAVE NO AIR POCKETS AND THE GROUND IS FIRM.
SPECIFIC THINGS I WANT TO SEE
- Compost MIXED with topsoil, not just compost.

step 6
Stake the tree (Clear stem trees only) (Photo required for guarantee) -
How to Stake a Newly Planted Tree
Staking helps newly planted trees establish strong roots by preventing them from rocking in the wind while still allowing a small amount of natural movement.
1. Position the Stakes
Place two stakes on opposite sides of the tree, just outside the rootball. This avoids damaging the roots while giving the tree stable support.
The stakes should be driven into firm ground, far enough from the trunk so they do not interfere with the rootball but still provide support.
As a guide, most 5-foot stakes are driven around 60cm (about 2ft) into the ground, leaving the top of the stake roughly chest height above ground.
Use a mallet or post rammer to drive the stakes vertically into the soil. The stakes must be secure and stable. In raised beds or newly filled soil it may help to drive them slightly deeper to ensure they are firm.
2. Attach the Tree Ties
Secure the tree to the stakes using two flexible straps or tree ties positioned roughly halfway up the trunk.
One strap should sit slightly higher than the other so the pressure is spread across a larger area of the trunk. From above, the tie should form a figure-of-eight shape, creating a small buffer between the tree and the stake.
The aim is to hold the tree upright while still allowing a small amount of movement, which helps the trunk strengthen naturally.
3. Check the Tension
The straps should be snug but not tight.
They should prevent the tree from leaning or flopping in the wind, but they must not cut into the bark or restrict growth. You should still be able to gently twist the trunk slightly — this small movement is beneficial for the tree’s development.
4. Ongoing Maintenance
Check the ties after strong winds or heavy rain.
Every few months, inspect the straps to ensure they are not rubbing or becoming embedded in the trunk as the tree grows. Adjust them if necessary.
Tree stakes are only temporary support. Once the tree is well established and can stand firmly on its own, the stakes and ties should be removed, usually after two to three growing seasons.

step 7
Final Tidy up! Mulch the base and double check the rootball is firmly in the ground (Photo required for guarantee)
Spread a 5–8 cm layer of mulch (like compost, bark, or leaf mould) around the base to:
Double check the sides are packed in with no air pockets and the top of the rootball is firmly level with the rest of the ground
Keep moisture in
Stop weeds growing
Protect the roots from temperature swings
Important: Keep mulch 10 cm away from the stem to prevent rotting.
AND FINALLY!
If there are any concerns regarding the health or condition of your tree upon arrival, these must be reported to us immediately with photographs so we can assess the issue promptly. This allows us to provide the best solution, whether that be advice, a replacement, refund or discount. Once a tree has been planted or left for a period of time, we are no longer able to determine whether any decline was caused by the original condition of the tree or by subsequent care and environmental factors. As these are perishable goods, many factors after planting can contribute to failure.
Please also double-check that your quantities and stem/trunk heights are correct. All trees are ordered on demand so your full order comes from the same batch and has a consistent appearance. Because of this process, we’re unable to make changes, swaps or refunds once the order has been placed with the grower.
If you do require any adjustments, please let us know as soon as possible before we submit the order.
IMPORTANT – PLANTING PHOTOS & GUARANTEE VALIDATION
To ensure your planting guarantee remains valid, you must email clear photographs of the trees and planting process to photo@hctrees.uk immediately after planting.
This allows us to assess that the trees have been planted correctly and to provide any guidance or corrections if required. Once reviewed, we will either confirm that everything is correct and the guarantee is fully active, or advise on any improvements needed before approval can be given.
We appreciate this requires additional effort on your part, however trees are living, perishable products and can decline very quickly if planted or maintained incorrectly. For this reason, we cannot accept responsibility for failures where planting guidance has not been followed or where photographic evidence has not been provided for assessment and approval.